Wednesday, May 27, 2015

Organizing with Kids: Papers

Are you inundated with paper? Despite all of our technological advances, phones, watches, tablets, and the like, I have yet to meet someone who does not struggle with this at home.

When you add children to the mix, paper becomes an even bigger issue. It's one thing to throw away junk mail, it's quite another when your sweet child comes home with his latest drawing or craft.

We can't hug all the cats, and we can't save all the papers. But, we can get a better system in place for handling it all and figuring out where it goes.

The challenge with paper is that it comes in daily and doesn't take a break. If you are getting massive pileups, you may not have a problem with getting rid of papers, you might just be backlogged because you don't have a good system in place to deal with the daily influx.

Here are some ideas that can help you get a handle on all those papers.

  • Reduce your mail. 
Set up online accounts and e-billing whenever you can to reduce paper clutter. Sort mail as soon as you get in. Just tossing all the junk mail and excess envelopes and pages will reduce your visual clutter and burden by half and keep important and time sensitive items from getting lost.


  • Identify a sorting spot. 
Typically the best spot is where you and your family go in and out daily. This could be in the kitchen, a hallway, a mudroom, a corner, a place near where you naturally tend to take off shoes, coats, put down keys, etc. This is the first line of defense, where your papers should go to be dealt with.


  • Keep a clipboard for any and all time sensitive material.

It's a fact that when you have kids your brain changes and you aren't able to focus. A clipboard is my solution to this problem. Anything that requires a response, like a kids party invitation, a bill, or a health form, should go here. This way you don't have to worry about losing it, and you have everything in one place when it comes time to sit down and pay bills. One clipboard in a designated place is a lot better than an unidentifiable pile.

  • Creatively display worthy kids art and projects in a designated area other than your sorting zone.
Consider displaying your kids favorite projects or artwork someplace else. This will make your more likely to put it up right away and get it out of the pile. You can get really creative with this, just make sure it will be something you will actually do in real life.


Hang a length of twine and clip papers with clothespins. Make a magnet board or a custom fabric board. Frame the standout pieces that you will want to keep for the longer term. Do something fun to recognize and celebrate creativity, that can be incorporated into your kids rooms or play areas.


  • Get one or two attractive organizers to act as a holding area. 
A holding area is the purgatory between the clipboard (immediate) and the unattractive office file box. It's for things that have already been opened and dealt with: paid bills, voided checks, whatever you need to hang on to and file eventually, but don't have time to do today or this week.


When the holding area gets full, and you have a little time, then you take the whole thing and file and organize it. I recommend something with a few compartments, but not too many. The idea is this is a temporary zone. Like the laundry bin, when it gets full, you need to address it.


The key to staying on top of papers, whether you have one child or eight, is to have a realistic system that works for you, your personality, and your home.

Make sure your system is simple enough for everyone to do, so everyone in the family can participate and keep the paper at bay.


Tuesday, May 19, 2015

Organizing with Kids: Toys

It's time to open up Pandora's Box! Well her Toy Box anyway.

This week I am continuing on in my mini series about organizing with kids. Today we're going to talk about toys.

Toys are a lot like clothes. They take up space. People like to give them to you as gifts. Kids outgrow toys. Kids throw toys ALL OVER the place. Toys pile up.

Having kids means having toys.

Don't worry, I love toys. My rule is that if I don't think it is fun to play with myself, I don't buy it. I enjoy my son's toys, I enjoy buying him toys, and I enjoy organizing them. I am not a toy hater. It keeps me in touch with my inner child.

You will need to decide how many and what type of toys are appropriate for your lifestyle and your kids' interests and stages. That being said, some of you are drowning in excess toys, they are taking over your life, and it's exhausting you.

Remember, you set the tone for how your house runs, and where things belong. If you don't set it, it will be set by your kids and they are not naturally known to be orderly and clean. But you would be surprised what they can do if you give them the proper environment.

I think it is possible to have a realistic amount of toys in any type or size of home and still have order and sanity.


Here are some tips for keeping your kids toys organized.


  • Designate specific areas for play, reading, and crafts.

For play, I recommend an enclosed playroom if you can. If you don't have that option, use any zone that has some type of defined boundaries. This could be a formal living or dining room you don't use, an office, a nook, a corner, etc  Any place you can make a "home base" for the toys that has enough space to play in safely and in sight of or in earshot of an adult. It doesn't have to be huge.
You can always take some toys out from there and bring them somewhere else if you need to.


For reading, create a cozy corner in your child's bedroom. My son calls his the "quiet corner." All his books are on a shelf next to it where he can reach them. (make sure your bookshelves are attached to the wall). This is where we read at night, and he goes there to "read" every morning when he wakes up. It can be as simple as a big pillow and a blanket.


For crafts, I think the best and easiest place is the kitchen or dining table. There is room to spread out, durable flooring underneath, and you can do some dishes or clean while your kids are coloring if you need to. Store things in designated containers, like "play dough" and "art supplies" and put them in an out of reach closet or cabinet nearby when not being used.  If you are short on space, stick to the basic crayons, markers, paper and play dough. You can always go out and buy a few things for a specific craft every once in awhile.


  • Keep like things together.
If you have a play kitchen, keep the food and cart next to it.  Put all the trucks in a "truck box". Put the train and tracks in a basket. Keep the puzzles in one basket. This makes it makes it easier for kids to find toys to play with, but also to help clean up.  Store items in baskets with open tops or in clear boxes so it isn't a mystery what is inside. 


  • Rotate toys.
Keeping a smaller amount of toys out not only keeps your play area cleaner, it keeps toys feeling new. Do this every few weeks. I even change the location of some of the toys that I keep out, just to keep it feeling different. When you do get a new toy, make it a point to put up a few that aren't getting as much use. Then when the new one gets boring, you can swap. Keep out two puzzles if you have five, one train set if you have more than one, etc.


  • Keep only age appropriate and relevant toys in the play area. 
 In the same way you swap out clothes that don't fit, do the same with toys. If you want to hang on to them for future kids, put them in a storage area until you need them again. I like to go to places where I can let my son play with things to see how interested he really is before I commit to buying. 

  • Make the most of your existing storage.
Most people have sufficient storage space, they just aren't using it to its full potential. Most closets can be customized using various built in or freestanding options. Consider hiring someone to come in and measure your storage and design your closets in a way that will work for you.


  • Use toys and toy containers as decor
Toys come in all different colors and shapes. Choose a few toys that have visual appeal and leave them out on a shelf or on a table. This makes them fun to play with and look good too!


If you stop by my home during the day you will see toys. Toys being used, dumped, brought outside, driving around, or stuck under the couch someplace with the motor still running. 


When the day ends, toys go back to the playroom. Before dinner, art boxes return to the closet.  At bedtime, books go back on the shelf. This allows a fresh start tomorrow and mental space for you at the end of a long day.

Love your kids, get messy, take stuff out.

Love toys, and love your home-by keeping toys organized and manageable.


Tuesday, May 12, 2015

Organizing With Kids: Clothing

Kids may not come with instruction manuals, but you can count on kids coming with stuff. 

Organizing this stuff takes some work, but I believe when we keep our kids' environments organized, it benefits them and makes life easier in the day to day.

Today I'd like to talk about clothes.

This problem starts as soon as soon as you have that baby shower. Who can resist the tiny little socks, slippers, bonnets, pjs, pantsuits and bibs?  If you are fortunate enough to have a traditional baby shower or any friend who has older kids you will end up with probably more clothes than you actually need just because they are so darn cute. If it's your first child, you don't really know what you need so you always have more.

I can safely say you only need one "baby's first" bib for each major holiday.


                                                                         Contemporary Kids by Scottsdale Interior Designers & Decorators
                                                                                                          J & J Design Group, LLC.


This keeps on going even when you have them and they have a billion things already. Who can resist a miniature size shirt that says Chick Magnet with a big yellow chick on it? 

How many times have you gone to Target just to buy toilet paper and you just had to buy that shirt/bib/onesie/hat?

Kids clothes, though they are small, can pile up before you know it. Add in gifts from family and friends and donations from friends, and the fact that they keep growing, and things can get unmanageable pretty quick.


                                                           Custom Nursery Closet by Kristin Bythewood Interiors


Here are some ideas for getting your kids clothing in order:

  • Keep a realistic quantity of clothing for each season. 

The clothes that are in your kids dressers or hanging up in the closet should only be the things they are wearing and using right now. I generally keep seven days worth of clothing as a baseline. This is supplemented by extra socks, underwear, pjs, a few nicer outfits for special occasions or church, a swim outfit, and maybe a few extra shirts or onesies for littler ones that throw up or make a mess daily. This gives you enough stuff for your kids to wear for a week.


Keeping a smaller amount of clothing overall makes you actually use and wear everything they have that actually fits. This is true for adults too!


  • Only keep clothes that actually fit in the bedroom. 


Anything hanging in that closet is fair game to be worn if your house is like mine. If I don't take things out, without fail, my son ends up wearing the one thing that doesn't fit. 

Gradually put too small clothes into a bag until you are ready to do a total swap out. Then take all of them out and replace them with the things you have stored in that next size up bin. Then you'll be able to see how much you already have, and if you need to get more, you'll know what you still need and can go to the store with a plan. Just like the grocery store it is all too easy to get enticed by additional items you don't really need.

  • Keep kids laundry separate.

Consider doing laundry by room, not by color or type of thing. You may do more loads per week but you will stay on op of it and not get to that point where someone "has nothing clean to wear". One kid can generate a significant load of laundry as you know. Avoid heaping overwhelming piles in you laundry room by keeping kids laundry in their own basket in their room until you are ready to throw it in the wash. If kids share a room, put two baskets in there, or combine if it's easier.

My son has his own little laundry basket in his closet. When the basket is full, he helps me put it in the wash, then I add in some bibs, the highchair cover, anything else that belongs to him that needs washing and do it all in one load. It gets dried, tossed back in the basket, and is put away before he goes to bed.


                                                   Contemporary Kids by Calgary Interior Designers & Decorators elle design


This keeps laundry in my house manageable and saves time since I am not sorting out adult underwear from baby socks. This also allows my son to take some ownership and help me with his stuff as he is able. It keeps things from piling up in my laundry room and spilling over. Who wants to look at a pile of laundry in a mountain? Not me. Hide it in the closet and shut the door. All of my closet designs typically include a location for a hamper or laundry basket of some sort. There are so many cute ones these days in fun colors and sizes.


                                                       Contemporary Hampers by Woodbridge Closet & Home Storage 
                                                                                            Designers Modern Littles


Having a system for your kids clothes can help you maintain a reasonable amount of clothing, keep life manageable, rooms cleaner, and laundry loads lighter. Who doesn't want that?


Wednesday, May 6, 2015

Decorating with Kids

I had a great time designing my son's room. My room growing up was very pink and flowery, perhaps that's why I was drawn to a more nontraditional color scheme with neutral walls that could work for a boy or a girl.

Rather than use the smaller bedroom as most people tend to do, I chose to use my larger guest room, which proved to work out really well as I had room for a comfy reclining chair, a place for the baby to play and do tummy time, and a bed in the room so we could swap off sleeping in the baby's room the first month, Nurseries really don't require much more than a changing table, crib, a closet and a chair, so we could fit it all in there and use our smaller room for other things.


Back when I made my nice sweet nursery I was not aware of the fact that when babies start moving, everything changes. 

Once my son started crawling and walking, he required the maximum security level of childproofing. If you can think it, my son could wreck it. If you had a lamp cord showing, he would unplug it. Floor lamps became giant swords to be pulled down and swung around. Heaven forbid it it if you have a GLASS coffee table, a plasma television or a pool.

Lawn ornaments, beware of my son-he is coming down the street to pull you all out of the ground and break you.

Where is my garbage can you ask? It's in the pantry behind the childproof lock. Cat food? behind closed doors. I can't tell you how many things have been thrown into the toilet at random.

We have an oven lock, stove knob covers, we deadbolt the doors, gate the entire upstairs, and keep very few lamps and accessories on display.

                              
Needless to say, decorating with active little ones can be a little daunting, so here are some things to keep in mind:


  • For lighting, stick with ceiling fixtures and consider installing a dimmer if you want to have some variation once your child is old enough to get in and out of bed. 


  • Make sure any heavy furniture is attached to the wall if it can tip over.
  • I highly recommend using older dressers with drawers and a changing pad on top instead of open changing tables. If the drawers are hard to open, this is a good thing, because it means your child can't easily open it. If you do have open storage, try to keep items in baskets.


  • If you have a cute mobile that attaches to your crib, consider trying to re-purpose it by hanging it from the ceiling from a hook where your child can't reach it once he or she starts standing up in the crib. The one in the photo above is now hanging on a ribbon over the changing table in my new house.

  • Use age appropriate toys as decor in kids rooms. Try to get vintage or used toys in certain colors and use them as accessories.

  • Use soft cubes for storage of small children's books, toys, stuffed animals, and other items. Your kids can easily slide them off a shelf and put them back, and it's a great way to add color and keep books orderly.                                                                                                                   


 Traditional Kids by Dallas Media & Bloggers Sarah Greenman

  • Consider using shelves and wall ledges to display breakable or delicate items instead of on side tables. Remember, in the early days, anything you place on your dining room table can and will be used against you.
  • Keep designated areas for playing and projects. Keep spaces simple and orderly so kids don't get overwhelmed by too much stuff. Change up the toys and swap items out for variety. If you are able, I am a big fan of designating a small room with a closed door as a playroom in order to keep clutter out of the main spaces.


    While the early stages have pretty strict safety requirements, don't despair. Sooner or later you can put those lamps and accessories back to comfort you when your kids are older and think you are no longer cool. 


    Wednesday, April 29, 2015

    Realistic Spending


    Did you know that we all have a specific money personality? I recently took a money personality quiz. These are the types:

    Spender   Saver    Investor   Giver    Avoidant

    A spender of course, tends to spend as soon as they get money. A saver doesn't. An investor always wants to make more money, the giver wants to give away money freely, and the avoidant doesn't want to deal with money.

    I assumed everyone could be grouped into two categories: spender (bad)  and saver (good) . I am a saver in case you were wondering.  However, the money personality quiz results point out that each type of money personality has both positives and negatives. Boo.

    Regardless of your money personality, if you are homeowner, in your lifetime you will be spending significant amounts of money on your home. 

    A reality of life and home ownership is that you will spend money. After you spend money on the actual house, the property taxes, insurance, the utilities, the appliances, and the maintenance, you have to spend money on the furnishings, the fittings, the lighting, the beds, the storage, the towels, the decor, the plates, the electronics, the television, the other television, another television...and on and on.....


    Some days this reality is almost enough to tempt me to go off the grid!


                      Rustic Exterior by Other Metro Architects & Building Designers Tumbleweed Tiny House Company


    While I am all about figuring out affordable and creative ways to my home and yours look and feel better, I am not a supporter of getting a bunch of cheap stuff or skimping on quality. I think careful planning and saving for improvements ultimately leads to better spending when it comes to all the permanent and non permanent fixtures in your home, large or small.

    I think many of us don't consider working with a designer because we think it's too expensive. Often that's not the case. Many designers (like myself) are willing to work with you even if your budget for furnishings is small or nonexistent. If you are ready to spend on paint or tile or flooring, it's worth the fee to pay for a brief consultation to help you make sure you are choosing the right materials that will look good and hold up in the long run.

    For larger projects, a designer can help you find savings on decor when things like plumbing and electrical are eating big parts of your budget. Often they have discounts on merchandise that they will pass along to you.

    Designers have vision and expertise. They help you see things you can't see and advise you on things you aren't savvy with. You pay them for this expertise, and it saves you in the long run.  They shouldn't push you to spend money you don't have on things you don't need, but encourage you to spend in the right places, and save in others.


    Quality people will respect you and your wishes and help you spend on what counts and make smart decisions that will make sense in the long run. 

    Regardless of your money personality, you are going to spend money on your home. How will you spend?

    Wednesday, April 22, 2015

    Creating Comfortable Corners

    Do you ever get in a decorating or organizing slump at home? Even though I help others with their homes, I can get in ruts on my own. First of all, I'm there all the time and look at it all day long. Add a busy and active toddler and a work at home husband, and there isn't always creative space to just....think. Can I get an Amen?

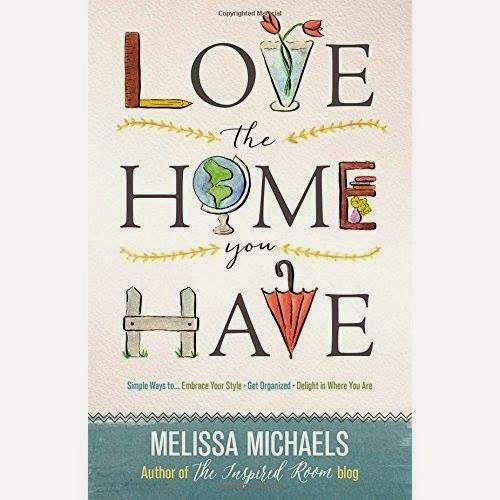
    I'm halfway through Reading Love the Home You Have by Melissa Michaels and it was just what I needed to get out of my slump and jump start some new ideas!


    I love my new open concept home, but it is harder to design because there are less walls to work with. We also have a longer narrow design to our main living space, so there is the added challenge of trying to avoid the "bowling alley" effect. Add living with a toddler who likes to touch everything and a husband more concerned about function than form, and it's daunting to decorate. So I just don't and get in a slump. And it bugs me.

    Chapter 9 is entitled Adding Charm and Character. Melissa writes:
    The charming ambiance you crave is possible, regardless of what you have to work with, when you create a comfortable place to be. Each corner and main space can be a welcoming area for you to connect with your family, rest awhile, and breathe a sigh of relief.
                                                                                             From Love the Home You Have

    She tells us to focus on the corners of our houses-making them comfortable and purposeful. She says to tackle one corner at a time and determine the function and the feel you want first.

    I have to say it was a bit of a light bulb moment. I was stressing out trying to focus on the look of the entire room, which was overwhelming me in our super open house where you can see everything. I am now creating corners, and it's much easier!


    My home goal for this year was to make my house feel more comfortable. This chapter was what I needed to get back on track with that goal. I've already tackled two corners and it's inspiring more ideas.

    Thanks Melissa!


    Check out Love the Home You Have on Amazon!


    Tuesday, April 14, 2015

    That One Thing

    Everyone has a"one thing" they collect. I'm not talking about spoons or stamps here.  After ten years of helping people get organized, I have found that everyone, regardless of how organized they are, has one thing that multiplies in their home over time.

    For my mom it was baskets. When she entertained she would put out these baskets for chips and snacks when family or friends came to visit.  I don't recall her ever buying the baskets, we just always had them. When we had to clean out the dining room, we found an entire piece of furniture dedicated to containing all these baskets.

    For my dad, it was magazines. Years and years of magazines.


    For my friend, it was boxes of herbal tea.  Things got a little tense when I suggested she consolidate her twenty half empty boxes of herbal tea into a smaller container.

    For another friend, it was armchairs. If someone offered her a chair, she couldn't refuse.

    My neighbor was just over the other day describing all her "card making" supplies stashed in the depths of a closet.


    And let's not even talk about tupperware.


    Many "one things" really don't have any personal or sentimental value, they just accumulate.


    My one thing is "stuff I plan to paint or repaint someday". You won't see it if you come over, but up in my little attic corner is a stash of frames, lamps and mirrors that have cracks or scratches, dents, or are otherwise not able to be used in their current condition.


    From time to time I take one out, put it in a spot in the house to "look at" for several days in various spots. Eventually it goes back up in the attic because it's an unfinished project staring me in the face. I forget about it for a bit, until I go up to put something else in storage, only to see it again.  Then I start the cycle again, taking something out, putting it somewhere, and eventually putting it back up in the same place!

    It's been a year and a half since I moved from a small single story ranch house in New England to a bigger, taller home in Texas and I still haven't used or painted any of those things.


    So that should tell me something about those things. That I really can't use them, I am not going to paint them, and they need to find another home.


    Sometimes the clutter you can't see is just as bad as clutter you can. It represents extra work, time, and effort you may not have or want to put in. These "one things" start to take up a lot of mental and physical space and if left ignored, continue to multiply at a rapid pace if you aren't aware.


    So, I challenge you today to identify your "one thing". What are you going to with it? 


    Wednesday, April 8, 2015

    Announcing "Love the Home You Have" by Melissa Michaels!


    Five years ago I opened my laptop and stared at it. My good friends had suggested earlier in the day that I start a blog. Since I didn't really know what to write about I started searching for other blogs about things I was interested in. 

    One of the first blogs I read was The Inspired Room by Melissa Michaels. At that time I was trying to figure out where my creative self and reality intersected with a tiny house budget and a lot of ugly. I had a lot of determination, an eye for design, but I got a B+ in elementary art class and always felt a little uncomfortable at those women's events where you have to do a "craft". 


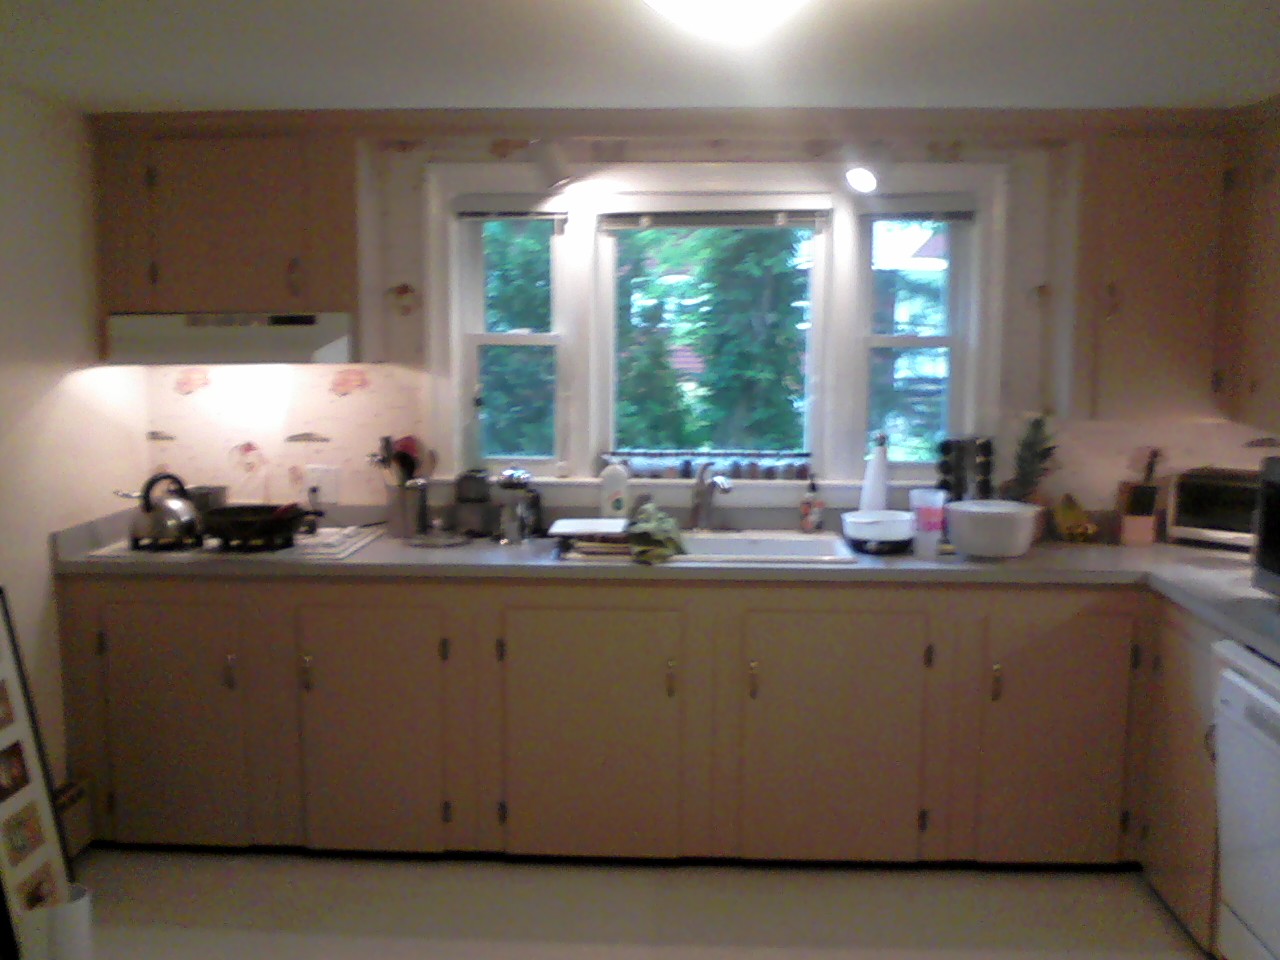
    50's Kitchen BEFORE


    We had just put most of the money we had into our first house, and I had tons of ideas and not much to spend. I was finding myself frustrated by the shows I loved on TV, because they gave me all these creative ideas and I realized that what they were doing was never going to happen in my home, in which every room was painted the color of the pants your grandpa used to wear.

    As I read the Inspired Room, I heard Melissa validating those feelings, but also encouraging and inspiring with a different message than TV: That our homes should be places we enjoy, that we want to improve and should work on, but we can't be perfectionists. That we miss out when we only think of what can be instead of appreciating where we are at right now. She also challenged me to do what I could do, instead of feel stressed out and sad about what I couldn't .

    With a lot of inspiration from Melissa and others, I slowly transformed my little 50's home the next few years with a lot of my own sweat equity and creativity. Maybe it wasn't magazine worthy, but it was Real Life worthy.  Paint cans and brushes, hammer and nails, plastic mitre box and mdf. And it's funny, even though I live in a new home now where nothing is old, smelly, ugly or quirky, I still won't forget the journey that began there.

    50's Kitchen AFTER


    Now five years later, I have the privilege of promoting Melissa's first book Love the Home You Have in the same week as launching Kristin Bythewood Interiors! I am so glad I let Melissa inspire me and teach me in those humble brown beginnings to make the most of the gifts I have in whatever home I am in. I encourage you to get this amazing book, and to check out her blog The Inspired Room!I can't wait to finish the book and get even more ideas and inspiration!


    Monday, March 30, 2015

    Do's and Don'ts of DIY

    Remember This Old House? It was a show my dad watched when I was young and in no way whatsoever contributed to our home improvement. It was on somewhere between The Victory Garden and The Joy of Painting. Though no one in my family gardened, renovated or painted, these shows often were on on the weekend. In my kid mind they about as exciting as their sports counterpart, golf.

    Funny now that ENTIRE channels are devoted to making what used to be everyday boring homeowner stuff glamorous, high drama and heroic, including amazing feats of demolition, drywall. design and....DIY.  Average looking tradespeople need not apply.

    DIY, for those of you who haven't heard, stands for Do-It-Yourself. Traditionally, it means to tile your bathroom without paying someone, repair a broken door, or install your kitchen without a contractor to help. Entire home manuals have been written to teach you poor willing souls to do these types of things yourself to save money. In the early days of our marriage I thought my husband would find these manuals very helpful and want to follow them when it came time to owning a home.

    More recently, DIY has taken more of a creative spin. On a typical home improvement show, the average and ordinary homeowners let the contractor and team of at least 20 free laborers do most of the work. Then the extraordinary designer/host works with the homeowners to make some kind of customized plant holder for their kitchen made out of reclaimed ship rope or some old broken pottery. 

    DIY is something I have a bit of a knack for, particularly when I am trying to get a certain look but I either can't afford what I want, or what I want simply doesn't exist. Some of my recent undertakings include spraypainted PVC curtain rods, painted striped curtains, and chalkboard tap handles for my husband's homebrew operation. While these were my more successful projects, there have been others that were not so successful.

    So here is some realistic DIY advice to inspire those of you who have never tried anything yourself but want to, and to warn those of you who "think you can do it" but may be in a little bit over your heads.


    I planned to spray paint this ceiling fan white.  After starting to take it apart and tiny pieces kept falling on the floor, I realized it would be much easier to just donate it and buy a new white ceiling fan for my son's room.

    DO Consider trying something small and inexpensive first. If it looks awful, you can mark it on the "hobbies" line of your family budget spreadsheet. If it looks good, you can put it on the wall and tell all the neighbors. You will probably have some fails before getting something good.


    DO  Research what other people have done before determining if you can do it. Many people share their projects online just like recipes and other things. I tend to look at three or four, and combine them to create my own version.

    DON'T underestimate the amount of work and time it will take. Just like trying a new recipe, or cooking technique, you will encounter some pitfalls that will may set you back or take time. 

    DO  Realize your own limitations. You may conceptually be able to do something in your mind, but just may not be a in a place in life where you have the time or effort to spend on a DIY project.

    DON'T Underestimate yourself. If you like the challenge of trying something new, try it, as long as you won't totally ruin your home in the process. If you're willing to see it through do it.

    DO one project at a time. It's so easy to start something, and never finish because you moved on to something else. When I am feeling the urge to do a project or redo something, I always ask myself, what outstanding project is sitting around somewhere. Getting that done will not only save money, but will give you a sense of accomplishment, and clear out some clutter.

    DON'T skimp on materials. Buy extra in case. Most things can be returned if they are unopened. It is always better to have too much than to have to interrupt your groove 'cus you ran out of something and have to go to the store and get more _______.

    DO Be patient with yourself. If you aren't under pressure to get it done, try to enjoy the process and learn as you go. Just like cooking, you perfect a recipe the more you do it. 

    DON'T Be afraid to ask for help from the right people. If you don't have a handy spouse or family member, go to a local hardware store if you can where people know what they are talking about. Or call a friend who has some skills. It's always good to bounce ideas off of someone out loud. 

    DO Know when to give up. Some projects simply aren't worth it when you calculate the cost of time or strain on your family. Know when to buy something or leave something to a professional. People who do this everyday know what they are doing. Think of it as treating yourself just like you would a massage, dinner out or a good housecleaning. 


    DIY can be really rewarding and enjoyable. The most important thing is that you enjoy the process!

    Tuesday, November 4, 2014

    Baby Steps

    It's been a year and two months since my husband, my son and I made the cross country trip to Austin Tx. A lot has happened. My baby became a toddler. My in laws moved closer. I turned 35. My husband started home brewing his own beer. We signed on to be partners in a brewery start up. We made new friends. We joined a great church. We didn't miss our snow blower. At all.

    On the home front? I painted and set up the garage. 


    And I am almost done with the office that I started a year ago.

    My last home was fixed up, decorated and staged to sell in two and half years. My one bedroom condo before that was renovated, decorated, painted and staged to sell in two years.


    Our current home, which was built brand new with nothing to fix, seems to have a task list a mile long, lots of empty walls, and an endless shopping list. 

    Yes, I do have a destructive toddler and a husband who says things like 'why do we need more than one dresser?' but that's a separate conversation.

    Maybe some of you are in the same boat. Whether you've been in your house for years or are the first owners, I'm sure you can probably relate to feeling like there is so much to do and you aren't making any progress. 

    I've seen different approaches to home improvement and decorating. Some people just want to get it done. They just put stuff up and get a bunch of stuff quickly so they can be done and feel like it's their place. And there is nothing wrong with that. Others don't ever do anything because they wait a long time, and then lose the motivation. When they have to sell the house they need the Property Brothers to intervene. Some people are those annoying weekend warrior types who just love home improvement and do it as a big family bonding event every week.  They are not reading this blog because they don't need to. 

    My challenge is that I'm trying to balance my designer mind with what is practical for a growing family and a modest budget. And if you are like me and most of my neighbors, you simply can't spend 400 dollars on a lamp or spend your whole weekend constructing shelving from reclaimed barnwood, no matter how super simple the DIY network tells you it is. 

    Even when I have some money to spend, or a little time to myself, sometimes I need some motivation to move forward and just do something already. 

    So here are some ideas to motivate those of us who feel stuck in a rut:

    First, recognize the small steps you are taking. Instead of thinking about what you didn't do yet, try to enjoy the things you have done.

    Second, try to do on one room at a time. Set a budget, then make a list of items you need, and action steps like painting, fixing, etc. That can keep you focused, especially if you moved into a larger home and you are starting more or less from scratch. We focused on the office since my husband works from home and needed that up and running pretty quickly. When he traveled, I would plan to try to get some stuff done in there while he was out of town.

    Third, be realistic about what you need vs. what you want. Decorative open shelving may be cool, but what are you going to put on them?  Maybe you can do better with a framed picture or something you already have in that space. 

    Fourth, try to focus on the functional items first before you decorate. These are practical things that you use all the time like cabinet hardware, towel bars or hooks, storage, shelving, light fixtures and ceiling fans. Determine what rooms should get priority based on how often they are used. these items typically are easier to pick out since there are only so many options. I hung a few towel hooks in my bathroom, and not only was it nice to have a place to put my towels, but it was a short quick project I could do in under an hour.

    Finally, try to enjoy the process. If you look at your house as one big to do list you'll never be able to relax. Enjoy looking at pictures of things you enjoy in magazines or online, and then pin them to Pinterest or cut out a picture and put it in a folder as you collect ideas you may use at a later date. When I pressure myself to finish a room I never like the result as much as when I take my time. I will often make shopping lists at stores I like online, and delete items when I decide I don't want them or track them to see when they go on sale. If you are out shopping, take a photo and save it. That way you won't purchase things out of emotion or pressure. Don't feel pressure to buy just because the store has a sale. They will have one again. Even if you have a coupon. Even if it's your birthday.

    So take a deep breath, enjoy the process and take it one step at a time.